Showing posts with label Make-up. Show all posts

Sunday, 19 October 2014

Shhh...10 Beauty hacks


Hack- A clever solution to a tricky problem

1) Use lemon juice to get rid of discolouration on nails by brushing it on with a nail brush, and then rinsing with water.

2) To fix a broken powder or eye shadow, put some rubbing alcohol on it and tap the mixture down with a spatula. Let it dry overnight and it will look like new in the morning!

3) To help remove surface stains on teeth, brush them with baking soda.

4) Apply Vaseline to eyelashes to condition and even lengthen them! Some swear by it to make lashes fuller, and thicker.

5) Before applying mascara dip a Q-tip in baby powder and run across your lashes. The mascara will then attach to the lashes, making them thicker and longer.

6) Use white eyeliner to accentuate your cupid's brow by drawing a 'V' above the centre of your lips. You can also use it in the inner rim of your eye to make you look more awake, and your eyes bigger.

7) Put Vaseline on pulse points before applying perfume to make the scent last longer

8) Massage almond oil into cuticles and nails to help battle brittle nails and flaky hands.

9) Run out of shaving cream? Just use your conditioner to shave instead!

10) To remove excess lipstick and avoid getting it on your teeth, stick your finger in your mouth and pull it out.


xx


Sunday, 5 October 2014

Make-up Staples

So- what should everyone's starter kit contain? I have put together a basic beginners guide as I don't think you need that many products, just enough to enhance your natural beauty.

Lip colour

Tinted lip balms moisture, condition, protect, but at the same time offer a slight bit of colour to make your lips pop. They are so much easier to upkeep than lipstick, and less sticky than lip gloss while offering the same shine, therefore I think it is the perfect compromise.

MUA Power Pout- £3.00 
My personal recommendation as they are nice and cheap but moisturise like a dream!

Concealer

If I only had time to wear 1 make-up product it would definitely be concealer! No spots and dark shadows under your eyes makes such a big difference- with the added advantage that it blends in seamlessly with your skin and goes undetected.
Collection Lasting Perfection Concealer- £4.19
Been using this for years and it has never failed me, I only wish they would add more shades!

Mascara

Application of mascara is always one of the final touches, what brings the whole look together. Just this on your eyes makes you instantly look more polished.
Rimmel Scandaleyes Retro Glam- £6.99
Check out my recent review on this mascara- the results where great!

Eyeliner

If you want your eyes to look bigger, rounder or more defined you can just draw a simple line above your eyes. Personally, I think a pen eye liner is the best to begin with as they don't smudge easily like pencil ones, and are much less fiddly than gel.
Bourjois Intuitive Liner- £6.99

My personal favourite as it has three different nibs placed next to each other which makes it so much easier to draw a winged liner.


Neutral eye shadow

A full palette, or quad is great as you can experiment with some basic colours and become comfortable with them They are wearable to anywhere, and using the darker colours in the crease, and brighter ones on brow bone and inner corner to highlight, you can go from day to night.

MUA Eyeshadow Palette Undressed- £4.00

I particularly love the MUA palettes as they are direct dupes of the more famous NAKED ones and so are a cheap alternative.

Hope this guide was helpful, please comment with your advice!

x

Sunday, 28 September 2014

Rimmel Scandaleyes retro glam mascara Review

After hearing a lot of positive things on this mascara I decided to give it a go, and I definitely don't regret it!
I'm extremely picky when it comes to mascaras as the brush needs to be not too big but not too small. When I noticed this had a hourglass shaped one, it interested me straight away. It really can get even to the smaller corner lashes, unlike straight shaped ones. 


The formula is a bit wet, so it can smudge quite easily, especially on lower lashes. When applying on them I use a tissue underneath to not ruin the rest of my make-up. It can also go clumpy if you apply too much of it at one time- however the results are really good!
without mascara

with 1 coat!

It volumises and thickens so well, false lashes aren't needed anymore!The wand must be one of the best shapes I have tried as it really fans the lashes out well, in a shape that lasts. I find that it is a really long lasting formulation that is suitable for the daytime but also evening.
Plus it comes as 12ml instead of the usual 9ml, what a bonus!

xx

Sunday, 6 July 2014

D.I.Y. Make-up Fixer

Don't you just hate how pricey make-up fixers from big brands can be? This is why I decided to make my own, and after a bit of research found out it is so easy! Only two ingredients are essential : water and glycerine. I also added a couple of drops of essential oil to make it smell nice, and to give the final product some added beauty benefits. But how does the product work? As glycerine is sticky to touch, it will not only keep your make-up in place, but also leave you with a dewy complexion while being free from any type of chemical. A complete must for people with sensitive skin.


This is how I did it:

The rule of thumb is 3 parts water to 2 of glycerine, so I used 75ml water and 25ml glycerine. Just mix them in the bottle and add some essential oils if wished. I used lavender and tea tree for the calming benefits which make it ideal for oily or combination skin. Shake it together. You're done!


Glycerine is also a natural moisturiser so will keep your skin hydrated while not clogging your pores. A double win!

Let me know in the comments below how you got on with it.

xx

Sunday, 29 June 2014

Prom Eye Make-up!

In the UK everyone who is a Year 11 (16 years old) has a Prom in the summer, after their exams are over. It is a big celebration where everyone that attends has to wear evening wear and it is a once-in-a-lifetime experience.


Everything laid out ready!

For my eye make-up I firstly used the MUA Undressed eye-shadow palette, which many people know as the dupe of Urban Decay's Naked palette! The colours are very similar and I can assure you they lasted a whole night of dancing and so are very good! 
After using my concealer as an eye primer I started by putting 'Shade 2' all over my eyelid. Then I proceeded into placing 'Shade 5' into the crease and blended any harsh lines. To create a balance I also placed it on the lower lashline, starting from the outside, and the halfway across, which also made my lashed look fuller. Next 'Shade 10' was blended out towards the outside of a crease to create even more depth.   
The silver shade in the Maybelline eye studio duo in 'Tapue Opal' was used for the inner corner - to create sparkle. 
Lastly I finished with my trustworthy Bourjois 'Inutitive eyeliner' and created a flick, adding 2 coats of the Seventeen 'Peep Show' mascara with lengthening fibres.


The night was so fun and I will definitely remember it- but tell me, have you had a Prom? 

xx


Sunday, 25 May 2014

D.I.Y. How to wash Make up Brushes?

Apologies for not posting last week! I had to revise for some exams I hated (ugh, physics) and so I didn't have much time to post :(


However this week I'd like to show you how to do something essential for your make-up routine - my method for washing brushes! Cleaning them helps extend their life and is incredibly important as they can harbour dirt and bacteria. That's not very nice for your skin, is it?

I used to just wash mine in a bowl of soapy water but as it used to bit a bit drying, I recently discovered another method which really gets them looking soft, shiny and new.

You will need: 
Soap (shampoo, dish soap.....anything you want )
Olive Oil (to condition the brushes as they will have been stripped of moisture from the soap)
Bowl

1. Add 1 part oil to 1 1/2 parts soap in a bowl.

2. Take your first brush and swirl it around in the mixture, you should see the mixture changing colour as the make-up is coming off it!

3. Rinse under cold water until the water you squeeze out is clear.

4. Leave to dry flat or facing down on paper towels or the water may get trapped inside and create a loss of hair, damaging the brush. Make sure they are fully shaped and leave them overnight.

How often should you wash them? It depends on your usage but I'd say anything from every week to every month!

How do you wash your make-up brushes? Comment below! xx


Sunday, 4 May 2014

Spring Make-up Buys

First Superdrug with the buy 1 get one half price on Rimmel, them boots with their 3 for 2's - how could I resist?

Both of these are first buys and I have been loving them. The crystal clear vinyl lip gloss can be a bit sticky but does dry and leave behind a glossy shine that lasts. The foundation is light coverage and easily blended, leaving behind a dewy look. A definite pro must be that even if it contains SPF18 it doesn't leave much of a white cast in flash photography!

This has always been one of my favourite concealers as it can hide all sorts of imperfections even when used alone. It lasts for ages, but due to its consistency can settle into fine lines so make sure to use powder on top! The only con must be the amount of shades, there are only 4 in this range.

Collection's lasting colour lipsticks only cost me £2.99 each, but last so much longer than higher end lipsticks I have bought before! Their consistency is not to dry, making it easy to apply on lips. I bought a deep red colour and a more pinky nude for everyday use.

First buy for both of these with the first being a lip liner, and the second being an eye liner. I have found that the nude pink shade of the lip liner is much darker than my natural lip colour, but the long wear and consistency of it totally make-up for it. I love to buy from MUA so when I saw they had a white eye liner for £1 I just had to give it a go. It's great to use on the waterline to make you look more awake, or in the inner corner to give the illusion of bigger eyes. Plus, it also comes with a pencil sharper in the lid!

I buy this time and time again as nothing quite matches up to it. Its jet black colour and 3 end-felt tip make it so easy to create the perfect flick, you won't be able to live without it! It doesn't smudge during the day and even lasts under the rain. Unlike many felt tips, this doesn't dry out after a couple of months.

Have you got any great make-up you can't live without? Comment below!! 
xx

Sunday, 27 April 2014

D.I.Y. What to do with the bottom of your lipsticks?

Lipstick is very important to me. The other day I hit the bottom of one of my favourite tubes and since I had no idea where I bought it from, felt reluctant and very sad at the thought of having to throw it away. Some others were in a similar situation and so I had an idea - why not melt them all and mix them together?  The whole procedure must have taken me around 10 minutes and is great fun for people like me who like to get creative. 

I melted mine with a hair dryer on full power, but using the over the stove method or in the microwave could be quicker, and none will go flying out of the tin! If you want to make it a softer texture you can add some Vaseline or any vegetable oil which will also increase the shine. 

Beware it can get messy!
 The funnest part must be mixing different shades together and seeing the end result of them. Here I mixed a dark plum, with the hot glittery pink colour in the tube above, plus some Vaseline. 

It won't take long to set and the end result is this, a lovely new lip gloss you can carry around with you - how cool is that? 

Sunday, 23 March 2014

Old Hollywood Star Looks

Ever wondered what secrets the Hollywood divas had to maintain their looks? Marilyn had her dewy skin, Audrey her baby-doll eyes and Katherine her clear complexion- all obtained through using simple tips and tricks which are easily achievable even now. Read on :)


Marilyn Monroe
She was famous for her Hollywood glow, which she maintained using a hormone cream. She layered that and powder foundation on top of each other to create a radiant base that shimmered on camera. The downside was she grew a fine layer of peachy-blonde hair over her face, which she was encourage to shave off but refused.
Get the look by mixing a pearlascent primer with a liquid foundation.


Audrey Hepburn
She was the Queen of the baby-doll look with a slick of liquid eye liner to create a feline flick, and a fine layer of mascara on the upper lashes. There is a rumour that she got her lashes so natural looking by separating them with a pin after applying mascara- ouch!
Get the look by using a mascara that allows you to build volume and a pen eye liner to make drawing the flick easier.


Marlene Dietrich
This German actress bravely shaved off all of her eyebrows and drew them on with a kohl pencil everyday, obtaining perfectly shaped brows. She never used mascara on her bottom lashes as she thought they cast a shadow creating the look of dark circles.
Get the look by defining your brows accentuating their natural shape. Fill them with powder or a brow mascara.


Vivien Leigh
Her perfect complexion was due to her customised skincare regime which used hand-mixed aromatic oils which also was common with English royalty.
Get the look by treating your skin to an aromatic facial. Run a clean flannel under a hot tap, applying relaxing essential oils such as lavender or tea tree, and place on your face to steam. Blast your face with cold water and pat dry. Massage a face oil or cream in to moisturise.


Greta Garbo
Her famous eye make-up was created with a thin layer of petroleum jelly over the lids, covered with skin-tone powder, and blended a darker shade in the crease to create deep-set eyes.
Get the look by using a good eye primer and a shimmery eye shadow.


Bette Davis
Her eyes were legendary- but how did she keep them that way? The simple method of placing cucumbers on her eyes and applying petroleum jelly under her eyes every night to protect against puffiness and dark circles.
Get the look by protecting the under eye area with eye cream and also applying cumber still works!


Grace Kelly
Her classic beauty was emphasised by an easy make-up trick. The illusion of high cheek bones was created by contouring her face with two different shades of blusher.
Get the look by using a blusher and a bronzer to shade and define your face.


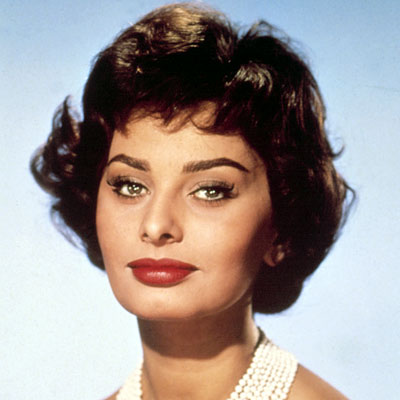
Sophia Loren
This Italian actress used olive oil to stay beautiful. She included at least 2 tablespoons of oil in her food everyday, rubbed a small amount into her face and added a few capfuls to a hot bath for a nourishing soak.
Get the look by using olive oil as a great natural moisturiser for your body, or buy olive oil based products.


Katherine Hepburn
She kept her complexion in top condition by exfoliating regularly. She massaged a mixture of sugar, warm water and lemon juice into her skin followed up with a splash of cold water to tighten the pores.
Get the look by exfoliating just like her!


What's your favourite tip then? Comment below! xx


Sunday, 26 January 2014

Review | MUA Power Pout


I really love lip products, and one that delivers shine, colour and moisture all-in-one must be praised. These lip crayons have a permanent space in my make-up collection! Other brands have expensive versions, but these are an amazing cheaper alternative.


Here I have 'Broken Hearted' a light raspberry pink, and 'Crazy In Love' a darker berry colour, the only two I own, but they come in 6 different shades which can be found here.


The crayon shape makes it easy to apply, filling in and lining your lips perfectly. The product glides on with no tugging, giving immediate moisture and providing a very glossy lip colour. Even after a couple of hours, the moisture lasts. However I found they sometimes, but only sometimes, they can settle in lip lines.

one coat applied

one coat applied
Once applied they have a minty smell- a bit like carmex- and you can feel a pleasant tingly feeling on your lips for a little while. Go for one coat for a sheer colour and two for a more intense one. Some time after you've applied them, I find that they develop into a darker, more intense colour. They lasted on my lips for a good 6 hours-ish even after eating and drinking.

Be careful though- they do melt in hot temperatures- like I discovered last summer in 40°C heat...... but this is due to the oils, butters and waxes it contains.

Ingredients: Ricinus Communis (Castor) Seed Oil, Polyethylene, Diisostearyl Malate, Beeswax, Caprylic/Capric Triglyceride, Hydrogenated Polyisobutene, Isononyl Isononanoate, Octyldodecanol, Euphorbia Cerifera (Candelilla) Wax, Copernicia Cerifera (Carnauba) Wax, Simmondsia Chinensis (Jojoba) Seed Oil, Butyrospermum Parkii (Shea) Butter, Phenoxyethanol, Ethylhexylglycerin, Fragrance CI 77019, CI 77891, CI 15850, CI15850:1, CI 45410, CI77492, CI 77499 

The shades are very wearable- yet I do wish they'd get a wider range of colours, maybe darker ones.
Prise-wise they are a steal at just £3 from Superdrug, even though often they have offers so you can get them for even cheaper! As they compare very well to their higher-end alternatives this is a must for any lip crayons fans, so what are you waiting for?


Sunday, 17 November 2013

D.I.Y. | Make-up Remover

This is probably one of the simplest things I have ever done. I love all things that are beauty related-creams, make-up, shampoo and more- but have you ever read what these products contain? I always try to buy the best quality products I can but it can be hard when the products in your budget contain a long list of unpronounceable chemicals. To my horror most of them contain silicones or even paraffin, the reason why your eyes burn when you are using the products. Some ever contain fragrance, which for people with sensitive skin like me, is one of the most horrible things ever.

So, after looking at some sensitive make-up removers in shops I decided to make my own. It cost me pennies and literally only took me a couple of seconds to make- you'll be amazed at how well it works!

shake it up before every use.....

Here goes:
4 tbsp water
1tbsp sunflower oil
(optional; just to make it feel nicer) 1 tsp glycerin

Pour it in a bottle and mix it all up. You're done.

It was that easy!

I have used sunflower oil as it is one of the lightest oils and can be easily washed off, but you could also use vegetable or sunflower oil if you don't have it. There is no need to rub, and I can assure you it removes even the most stubborn waterproof make-up! I follow up with a face wash to clean off the residue of the oil. Only thing is that it should be used up after around a week as the water can make the oil go off easily.

Related Posts Plugin for WordPress, Blogger...